Kubernetes/따라하면서 배우는 쿠버네티스
[쿠버네티스] 6-4. DaemonSet! + RollingUpdate
맨날화남
2023. 8. 2. 15:00
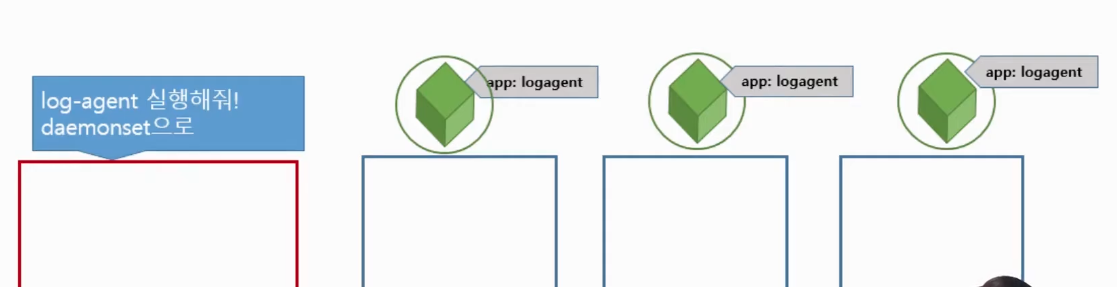
DaemonSet
- 전체 노드에서 pod가 한 개씩 실행되도록 보장
- 로그 수집기, 모니터링 에이전트와 같은 프로그램 실행 시 적용
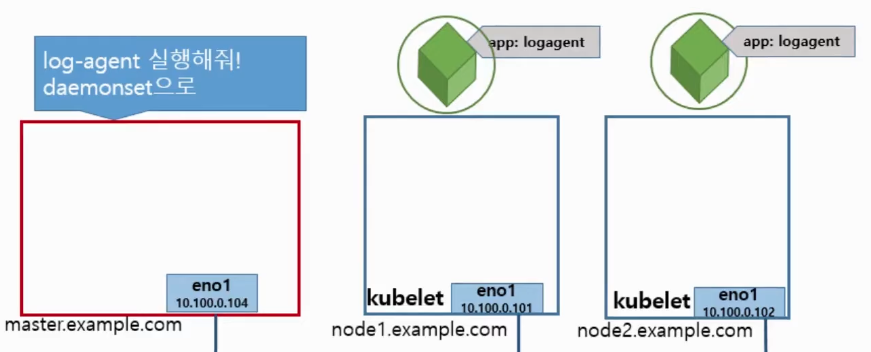
- 만약 pod에 문제가 생겼을 시 문제 생긴 pod가 삭제된 후 다시 생성한다.
- 이렇게 모든 pod에서의 동작을 보장하기에 로그수집기나 모니터링 같이 모든 pod에 있어야 하는 거에 많이 쓰임
DaemonSet definition
| ReplicaSet definition | DaemonSet definition |
| apiVersion: apps/v1 kind: ReplicaSet metadata: name: rs-nginx spec: replicas: 3 selector: matchLabels: app: webui template: metadata: name: nginx-pod labels: app: webui spec: containers: - name: nginx-container image: nginx:1.14 |
apiVersion: apps/v1 kind: DaemonSet metadata: name: daemonset-nginx spec: selector: matchLabels: app: webui template: metadata: name: nginx-pod labels: app: webui spec: containers: - name: nginx-container image: nginx:1.14 |
DaemonSet example
$cat daemonset-exam.yaml
apiVersion: apps/v1
kind: DaemonSet
metadata:
  name: daemonset-nginx
spec:
  selector:
    matchLabels:
      app: webui
  template:
    metadata:
      name: nginx-pod
      labels:
        app: webui
    spec:
      containers:
      - name: nginx-container
        image: nginx:1.14
TEST


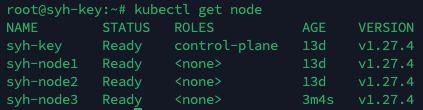
Node 추가
- 우선 node를 하나 생성해두고 control-plane 접속해서 node를 추가해보자
- node에서 control-plane에 join 할라면 token이 필요한데 token의 유효기간은 24시간이기에 처음에 생성한 token은 쓸 수 없다.
- 그러니 control-plane에서 token을 새로 생성하여 join 하도록 하자
- kubeadm token list : 토큰 목록 확인
- kubeadm token create --ttl [시간] : 토큰 생상
- kubectl reset : 해당 node가 control-plane에 연결했던 이력이 있었다면 node에서 reset으로 node 정보를 초기화한다.


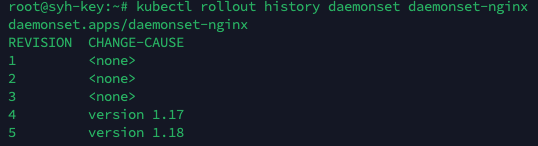
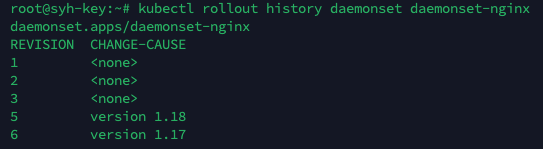
Rolling Update
- DaemonSet도 Deploy처럼 Rolling Update 기능을 가지고 있다.
- kubectl edit daemonset daemonset-nginx 로 확인해보자
apiVersion: apps/v1
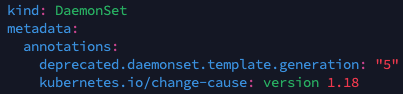
kind: DaemonSet
metadata:
annotations:
deprecated.daemonset.template.generation: "1"
creationTimestamp: "2023-08-02T04:52:46Z"
generation: 1
name: daemonset-nginx
namespace: default
resourceVersion: "580163"
uid: da7b47b3-c3d9-4c2b-a71a-d934eefdbdf5
spec:
revisionHistoryLimit: 10
selector:
matchLabels:
app: webui
template:
metadata:
creationTimestamp: null
labels:
app: webui
name: nginx-pod
spec:
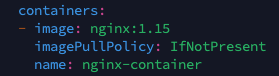
containers:
- image: nginx:1.14
imagePullPolicy: IfNotPresent
name: nginx-container
resources: {}
terminationMessagePath: /dev/termination-log
terminationMessagePolicy: File
dnsPolicy: ClusterFirst
restartPolicy: Always
schedulerName: default-scheduler
securityContext: {}
terminationGracePeriodSeconds: 30
updateStrategy:
rollingUpdate:
maxSurge: 0
maxUnavailable: 1
type: RollingUpdate
status:
currentNumberScheduled: 3
desiredNumberScheduled: 3
numberAvailable: 3
numberMisscheduled: 0
numberReady: 3
observedGeneration: 1
updatedNumberScheduled: 3- revisionHistoryLimit, maxSurge, maxUnavailable 등 Rolling Update 옵션이 보인다.
- Daemonset에서는 여기서 이미지의 버전만 바꾸면 update가 된다.